Building a storage shed doesn’t have to break the bank. With careful planning, smart material choices, and the right tools.
you can create a functional and durable shed without overspending. In this guide, we’ll walk you through every step to help you build the cheapest storage shed while maintaining quality and utility.
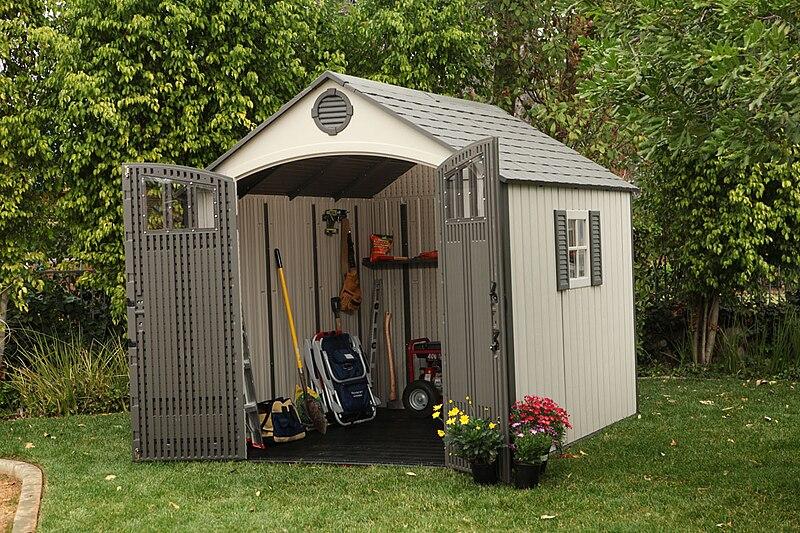
Why Build a Budget-Friendly Storage Shed?
A storage shed is a practical addition to any property, offering extra space to store tools, equipment, and other belongings. However, pre-built sheds or hiring professionals can be expensive. By building your own shed, you save money, customize the design to your needs, and gain the satisfaction of completing a DIY project.
For affordable shed-building plans and expert advice, visit Shed Solutions.”This placement positions your website as a go-to resource for shed-building information.
Step 1: Planning Your Shed
1. Setting a Budget
- Determine how much you’re willing to spend on the project.
- Factor in costs for materials, tools (if you don’t already own them), and any unexpected expenses.
- Sticking to a budget ensures you’re not overspending while building a functional shed.
2. Selecting the Right Location
- Choose a flat and stable area on your property to avoid additional leveling work.
- Ensure the site has proper drainage to prevent water damage.
- Check local building codes or HOA regulations to confirm your chosen location complies.
3. Choosing a Simple Design
- Opt for a straightforward, box-style shed with a sloped roof to minimize material costs.
- Avoid complex features like intricate windows or elaborate roofing styles.
- Use free or low-cost shed plans available online for guidance.
Step 2: Affordable Material Options
Materials to Consider
- Plywood: Cost-effective and versatile for walls and flooring.
- Reclaimed Wood: Sustainable and budget-friendly if sourced from pallets or old furniture.
- Corrugated Metal Sheets: Great for roofing due to their durability and affordability.
- Gravel: An inexpensive option for a stable foundation.
- Concrete Blocks: Ideal for creating a sturdy, low-cost foundation.
Step 3: Tools You Need
Essential Tools for Building Your Shed:
- Saw (Manual or Power Saw):
- Necessary for cutting wood to size.
- A hand saw is cost-effective, but a circular saw saves time and effort.
- Hammer:
- Used to drive nails and assemble the shed’s structure.
- Choose a lightweight hammer for ease of use during extended projects.
- Measuring Tape:
- Ensures precise measurements for accurate construction.
- A 25-foot tape is versatile for most DIY tasks.
- Drill (Cordless or Electric):
- Speeds up the process of screwing and drilling holes.
- Opt for a model with interchangeable bits for versatility.
- Level:
- Ensures your shed is straight and stable.
- A small 2-foot level works well for most projects.
- Clamps:
- Holds materials steady during cutting or assembly.
- Adjustable clamps are versatile for various tasks.
- Utility Knife:
- Useful for trimming, cutting insulation, and more.
- A replaceable-blade model ensures consistent performance.
- Safety Gear:
- Includes gloves, goggles, and a dust mask to protect you during construction.
- Pencil or Marker:
- Essential for marking measurements and guidelines.
Step 4: Laying the Foundation
Why the Foundation Matters
- A sturdy foundation ensures the shed’s durability and stability.
- It prevents shifting, water damage, and structural issues over time.
Cost-Effective Foundation Options
- Gravel Base: Cheap, easy to install, and offers excellent drainage.
- Concrete Blocks: Affordable and provides a stable platform for the shed frame.
- Pressure-Treated Wood Skids: Ideal for small sheds and easy to reposition if needed.
Step 5: Building the Frame
Frame Design on a Budget
- Use 2×4 lumber for the frame—it’s affordable and readily available.
- Follow simple plans to create a square or rectangular frame.
Fasteners and Support
- Use nails or screws to secure joints; screws offer better longevity.
- Add diagonal braces for extra stability.
Step 6: Adding Walls and Roofing
Walls
- Use plywood or reclaimed wood to construct walls.
- Secure walls to the frame using screws for added durability.
Roofing
- Install corrugated metal sheets for a weather-resistant and low-cost roof.
- Ensure proper overlap between sheets to prevent leaks.
Step 7: Doors and Windows
DIY Door Construction
- Build a simple hinged door using plywood and 2x4s.
- Install a latch or lock for security.
Window Placement and Tips
- Use salvaged or second-hand windows to save money.
- Place windows strategically for natural light and ventilation.
Step 8: Painting and Finishing
Affordable Painting Options
- Use exterior-grade paint to protect against weather and wear.
- Check for discounted or leftover paint at hardware stores.
Adding Final Touches
- Seal gaps with caulk to improve insulation and waterproofing.
- Add shelves or hooks inside the shed for better organization.
Final Thoughts :
Building the cheapest storage shed is a rewarding and cost-effective project. By carefully planning, choosing budget-friendly materials, and using essential tools, you can create a shed that meets your needs without overspending. Take pride in your DIY skills and enjoy the extra storage space your shed provides.
FAQs
1. How much does it cost to build a cheap storage shed?
- With budget materials, a simple shed can cost between $300 and $700, depending on size and design.
2. Can I use recycled materials for my shed?
- Yes, reclaimed wood, windows, and doors can significantly reduce costs.
3. Do I need a permit to build a shed?
- Check local building codes. Many areas allow sheds under a certain size without permits.
4. How long does it take to build a shed?
- A basic shed can take 2-4 days, depending on your experience and the complexity of the design.
5. What’s the cheapest roofing option?
- Corrugated metal or asphalt shingles are affordable and durable roofing choices.
Read More Articles :
4-seater-electric-recliner-sofa-delivery-before-christmas-day-40-off